

Overview
A workflow runs on its own. It starts when something happens, such as a file being uploaded or an email attachment arriving, or on a schedule. It then checks each file and does something with it, such as moving it to the right folder, renaming it, sending a message or asking someone to approve. Every workflow has the same shape:- Sources: what starts it. See Triggers.
- Decisions: which path each file takes, decided by the file’s details, by AI reading the file, or by a person.
- Actions: what happens to the file. See Steps for both.
Example workflows
- File invoices from email: when an attachment arrives in Gmail, save a copy to The Drive AI, check whether it’s an invoice, then move it to a folder for the client and year.
- Rename scans: when a file is uploaded to a scans folder, rename it with the date and document type read from the page.
- Clean up old files: every Sunday, go through an archive folder and move anything older than 7 years to the trash, after an admin approves.
- Tell the team: when a signed contract lands in a SharePoint library, post the client name and amount in a Slack channel.
- Split batch scans: when a scanner drops a stack of leases as one PDF, split it into one file per lease.
Who can use workflows
- Owners and admins create, edit, run, pause and delete workflows.
- Everyone else in the workspace can open any workflow to see its steps and settings, read its activity, and decide approvals that are addressed to them. The editor shows View only for them.
The Workflows page
Click Workflows in the left sidebar. You can also open Settings > Workflows and click Open workflows.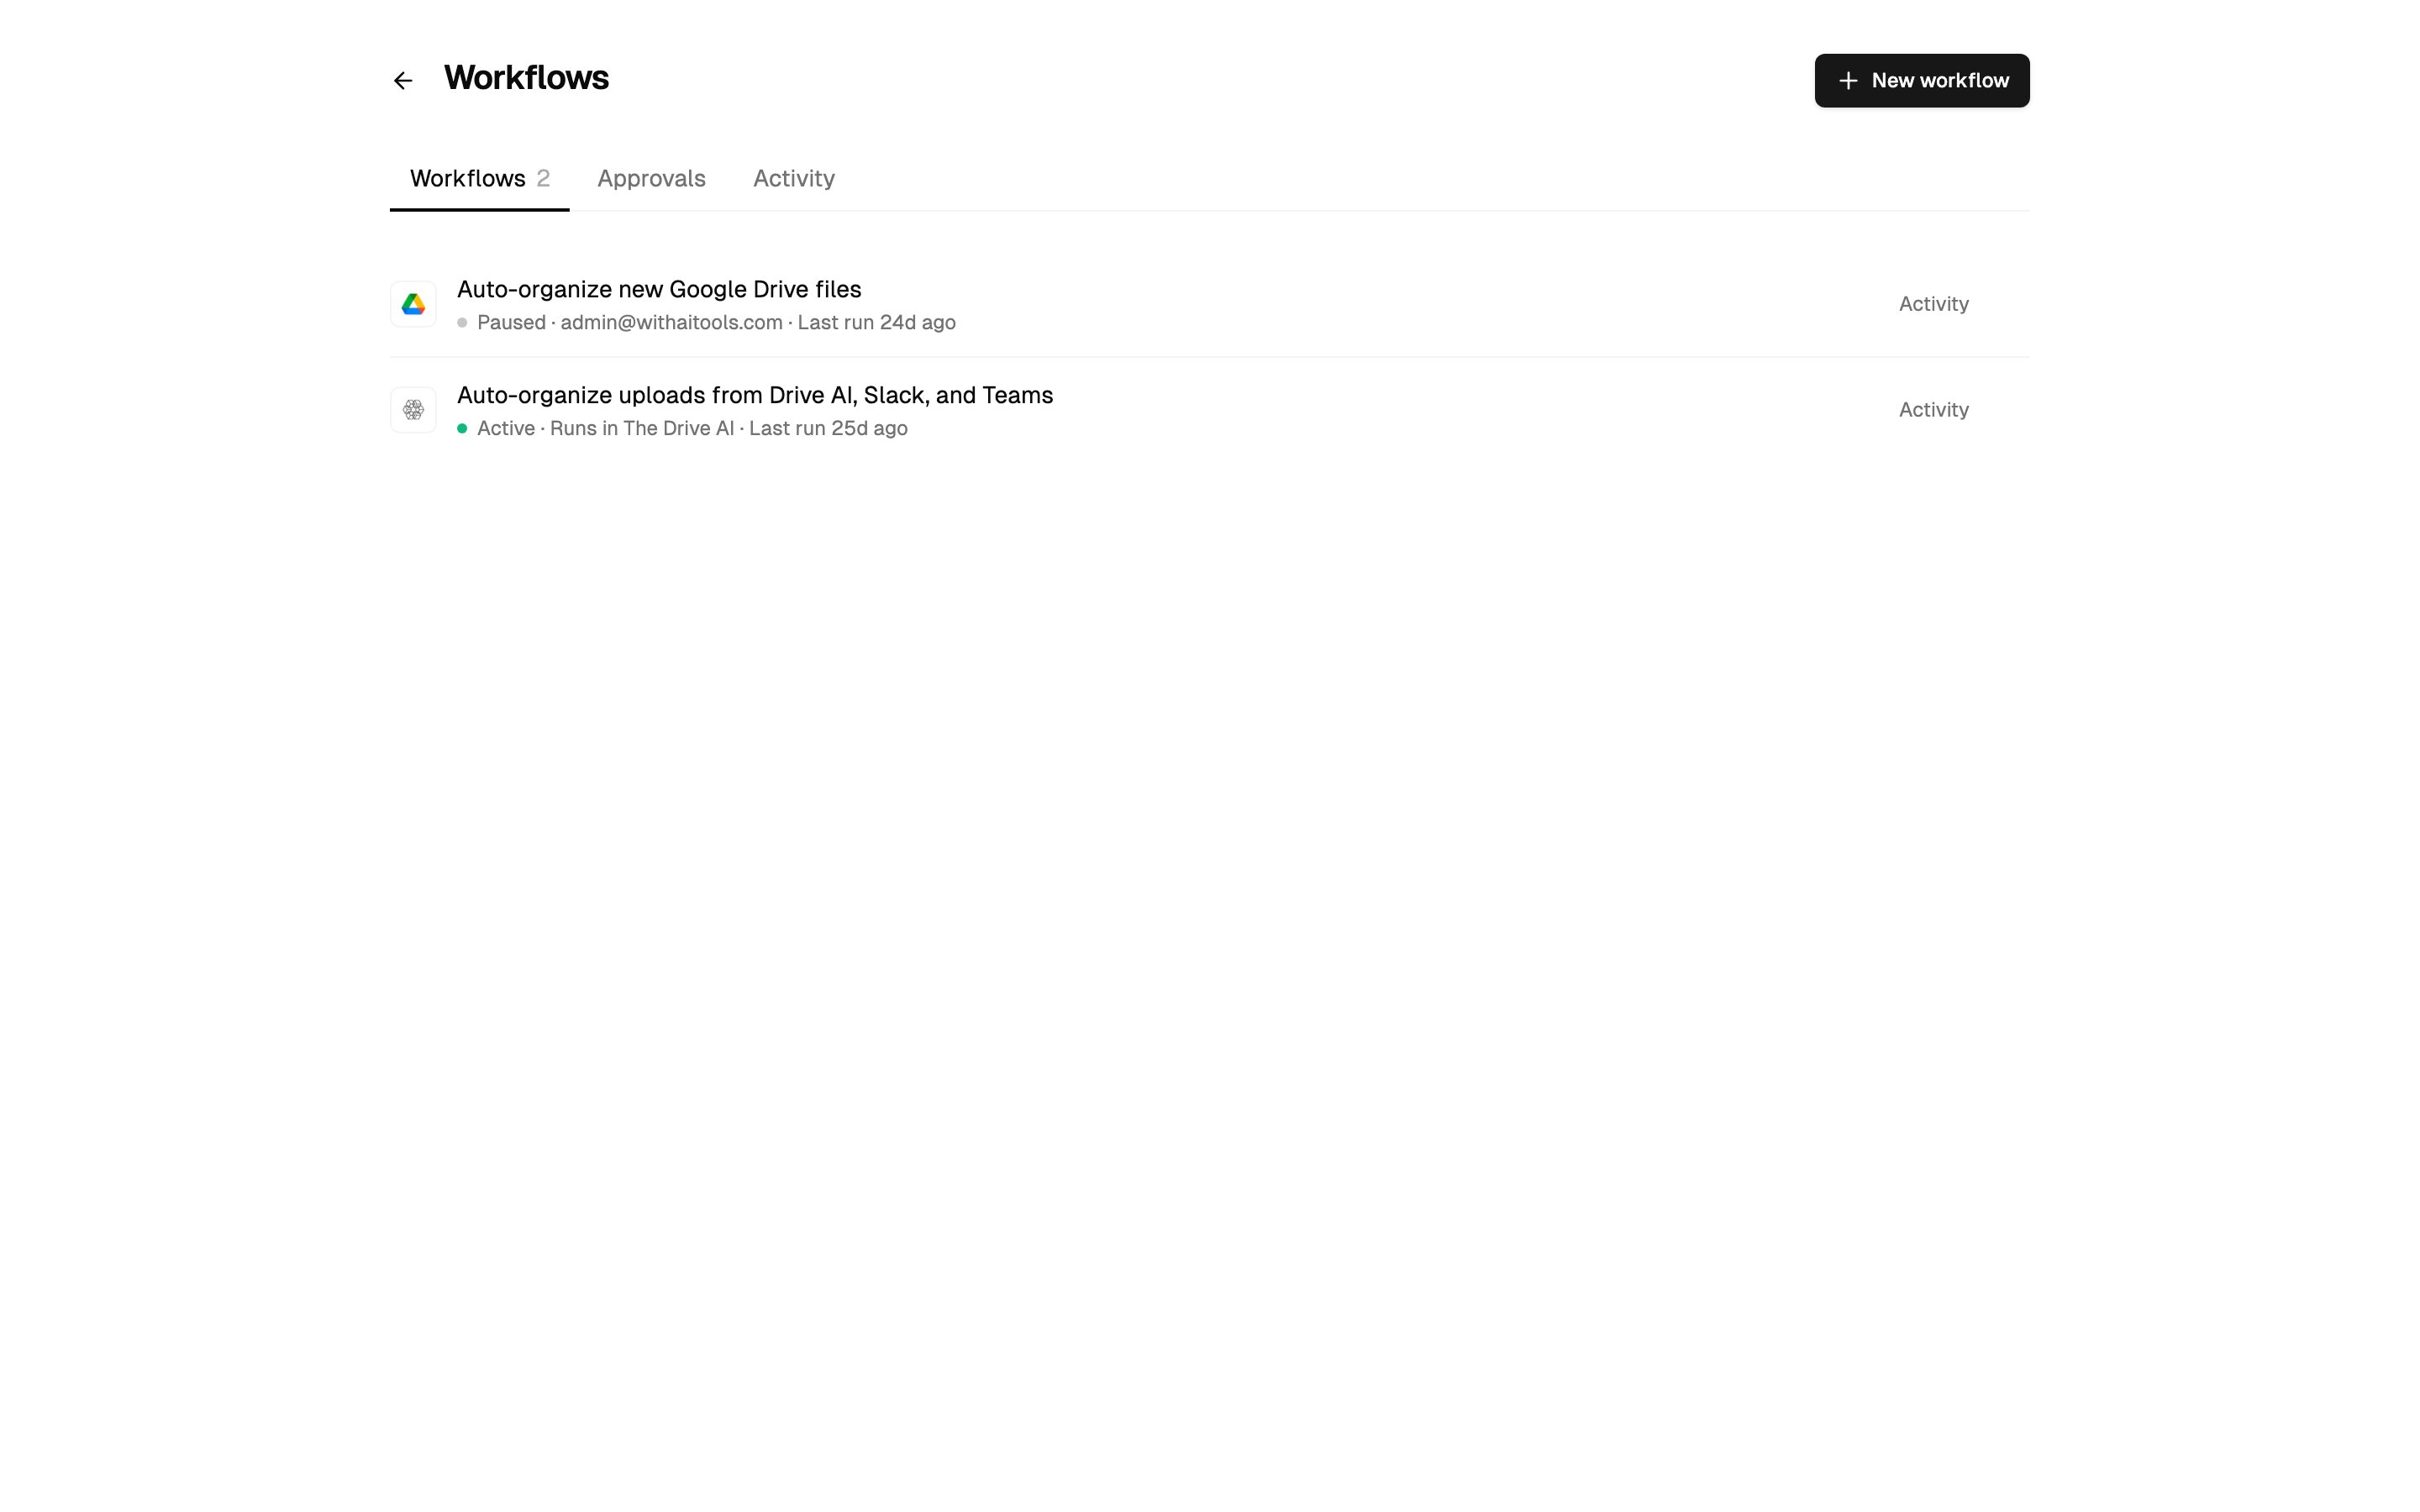
Banners above the tabs tell you when something needs you, for example 2 approvals are waiting on you or 1 workflow is asking to use your account. Click Review to go to it. A banner also appears when the workspace is close to or out of its monthly workflow files.
On a workflow’s row, click Activity to see only its runs. Owners and admins can open the … menu to Edit or Delete it.
Create a workflow
You can create a workflow three ways. All three end on the same canvas, where you can check and change everything before you save.Describe it
1
Start a new workflow
On the Workflows page, click New workflow.
2
Say what you want
Under What would you like to automate?, describe it in a sentence or two, for example “When I get email attachments, sort invoices into client folders”. The builder assembles the sources and steps on the canvas.
3
Check each step
Click any step to open its settings and change them. Click Validate to check the workflow for problems.
4
Save
Click Save. A new workflow saves as Active unless you switch it to Paused first.
Build it on the canvas
1
Start a new workflow
On the Workflows page, click New workflow, then click Build manually instead.
2
Add steps
Open the Nodes tab in the left panel. Tap a node to add it, or drag it onto the canvas. Nodes are grouped as Sources, Decisions and Actions, and you can search them.
3
Connect them
Drag from a step’s connection point to the next step. A decision has one exit per answer or path. Leave an exit unconnected to stop there and leave the file as it is.
4
Set up each step
Click a step to open its settings. Settings that most workflows don’t need are under More options.
5
Validate and save
Click Validate, fix anything it lists, then click Save.
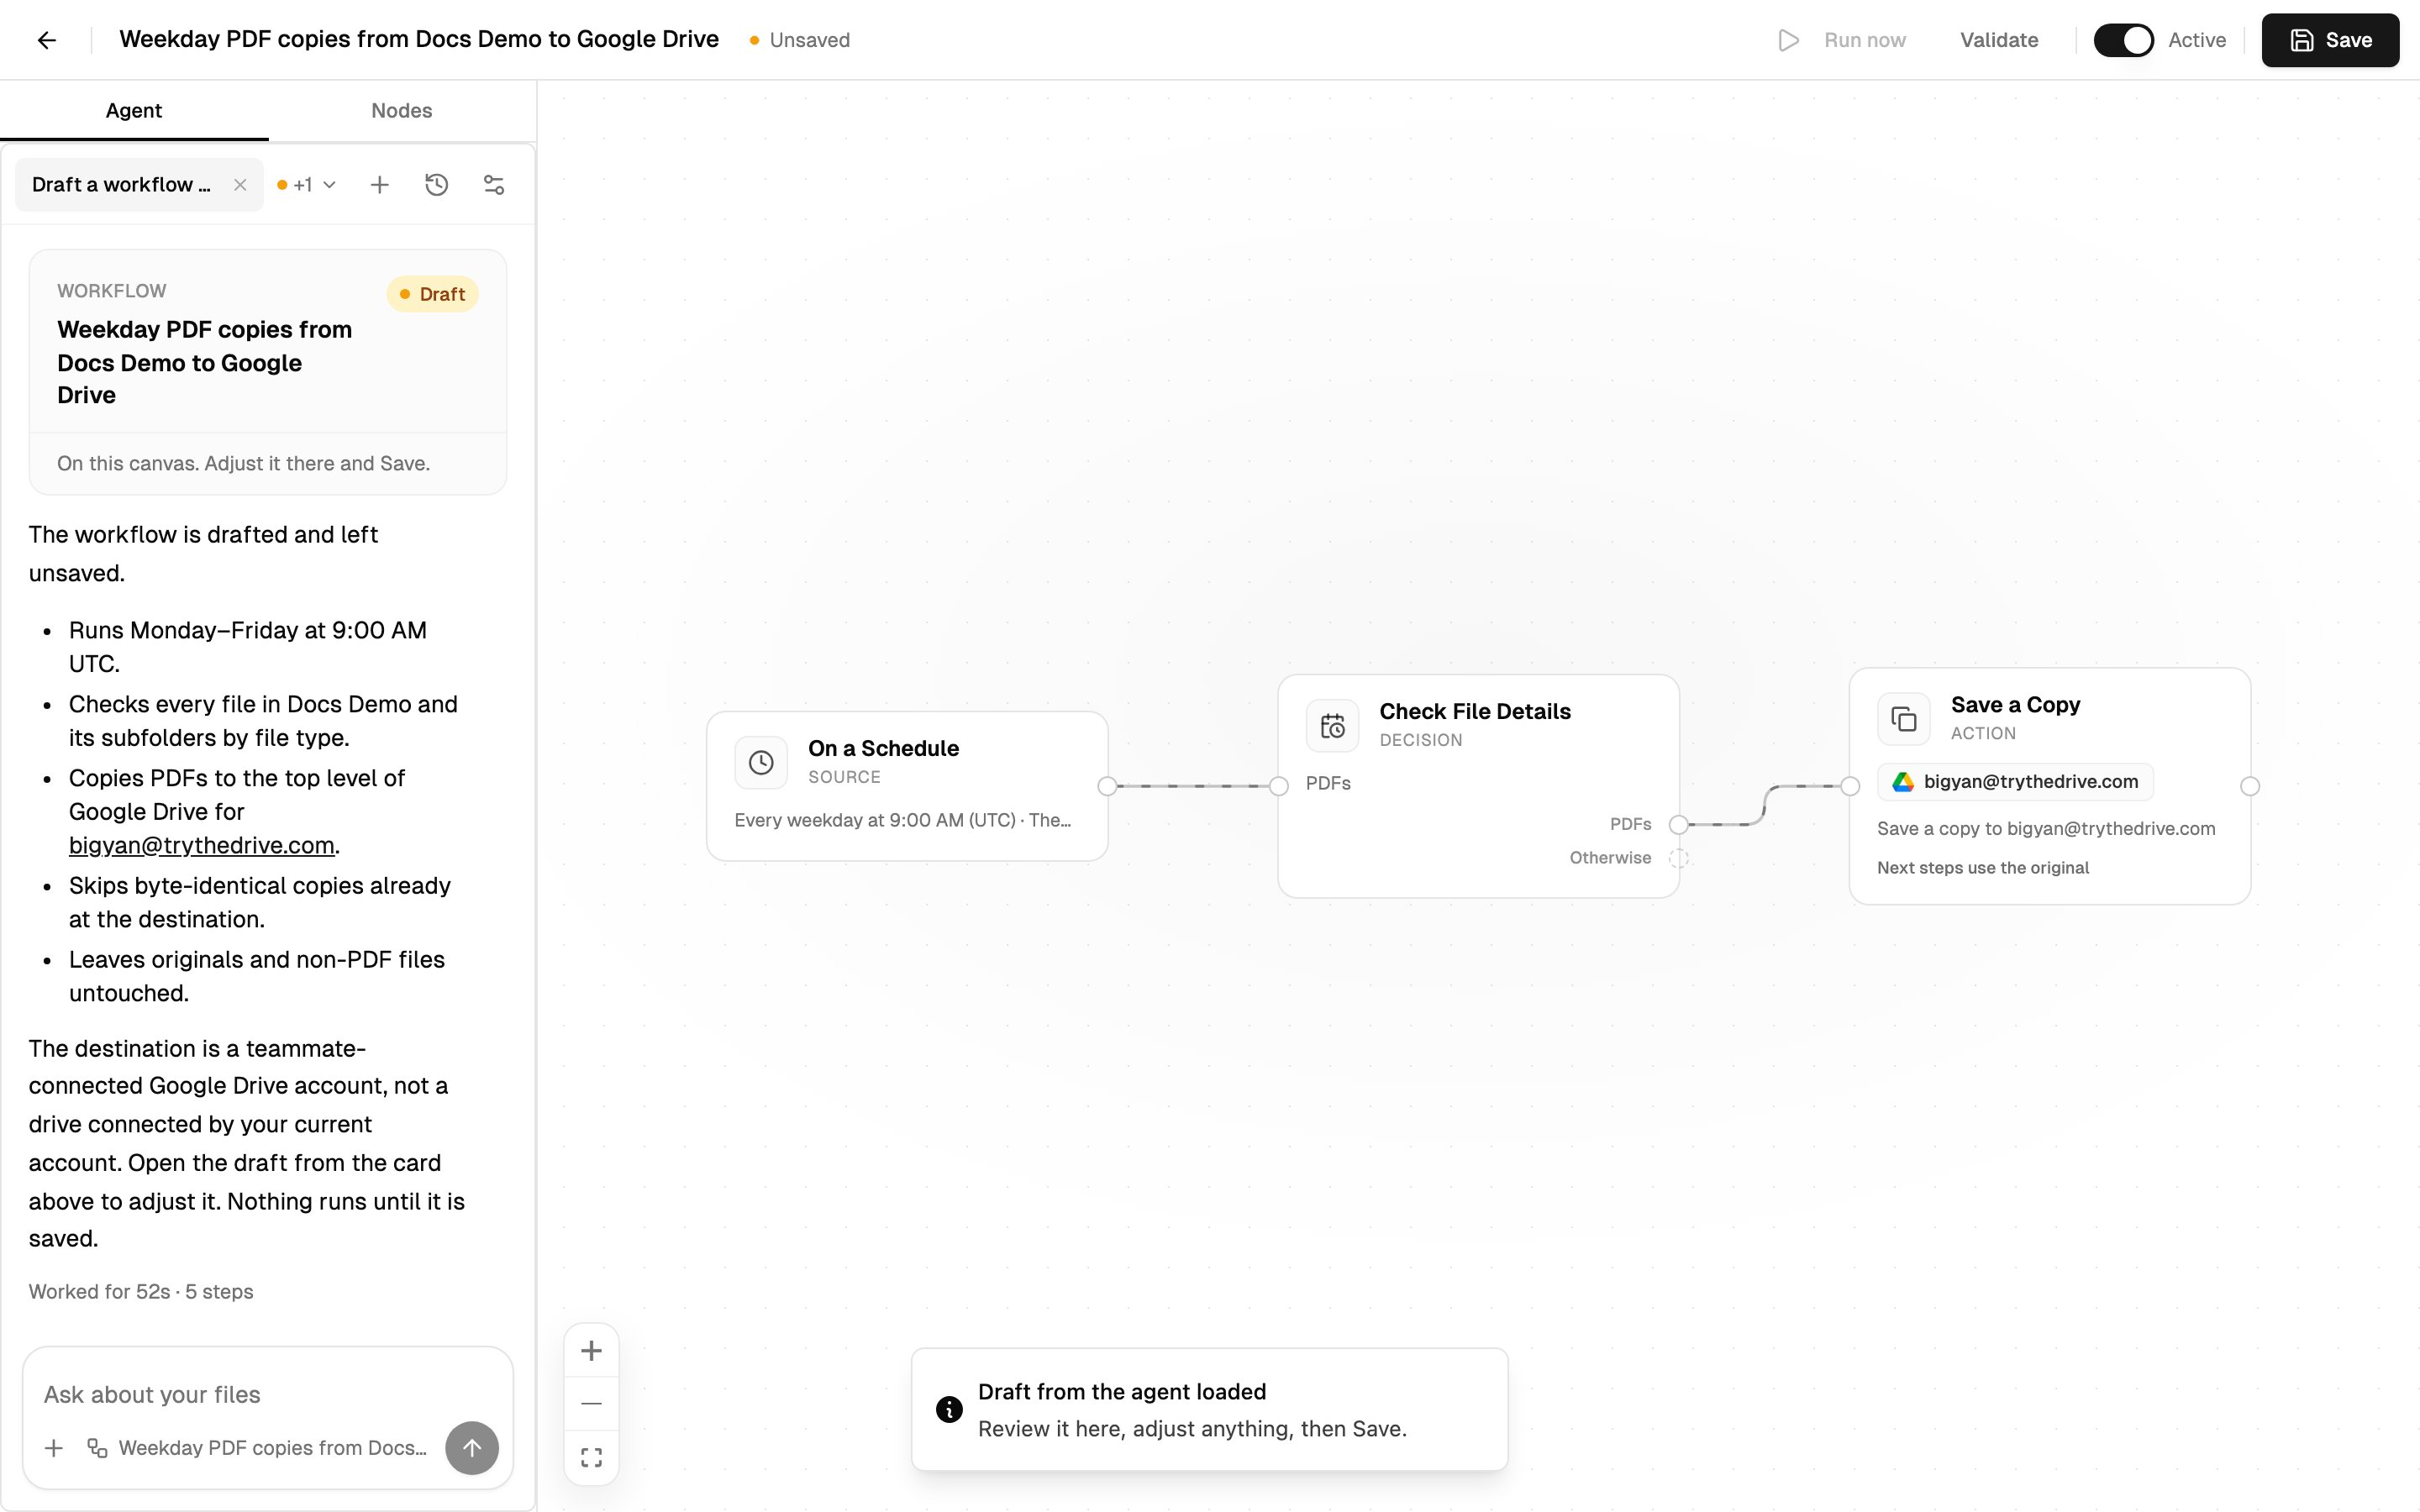
Ask the agent
Ask the agent in any conversation, for example “Whenever a file lands in Inbox, file it by client and year.” It shows you a draft that you can Open in editor or Save. On the canvas, the Agent tab beside Nodes lets you change the workflow in words. See Building with the agent.Turn a workflow on or off
In the editor’s toolbar, use the switch next to Validate. It shows Active or Paused, and the change takes effect straight away without saving. A paused workflow ignores new files. Turning a workflow on checks it again. If it uses a connected account that has been disconnected, you’re asked to reconnect it first. If your plan no longer includes connected accounts, it can’t be turned on until you upgrade. If you save changes made by the agent that removed sources or steps from an active workflow, you’re asked to confirm, because the removed parts stop working as soon as you save.Run now
A scheduled workflow can be tried without waiting for its next run. Save it, then click Run now in the editor’s toolbar.- It runs for real, on up to 5 files from the scheduled folder, newest first.
- It works even while the workflow is Paused, so you can try one before turning it on.
- It doesn’t change when the next scheduled run happens.
- The Activity tab opens so you can watch what happens.
Delete a workflow
On the Workflows page, open the workflow’s … menu and choose Delete. The workflow stops running and its activity history is removed. Files it already organized aren’t affected. This can’t be undone.Coming from Auto Organization
If your workspace used automatic filing before, an owner or admin can open Settings > Auto Organization. Any organizing instructions you wrote are kept there, and one click turns them into a workflow: Build a workflow from these instructions, or Build the workflow for me if you never wrote any. The builder opens with the draft, and you review it before it runs. Organizing a folder on demand with ⌘K is separate and still works. It has its own monthly count in Settings > Usage.What’s next?
Triggers
Every way a workflow can start, and how to narrow it.
Steps
Every decision and action, with examples.
Building with the agent
Create and change workflows by asking.
Approvals and activity
See what ran, retry failures and make decisions.
Workflow files
The monthly allowance and what happens when it runs out.
Connected drives
Connect Google Drive, OneDrive, SharePoint and Dropbox.